If it returns "True" then their IP is blocked by our server so you can notify the engineers to unblock it; otherwise proceed to step 4.
Step 4) Then there is a possibility that they have DNS issue; just replace http://phone.fibrehub.com with http://69.172.225.99; also any registration proxy on spider please make sure you use the IP address instead (for example 64.34.222.236 instead of reg0.sipconfig.net)
Then reboot the phone and see if it registered; if yes proceed to step 5; otherwise the client has HTTP blocked for the phone on their router/firewall and need to unblock it.
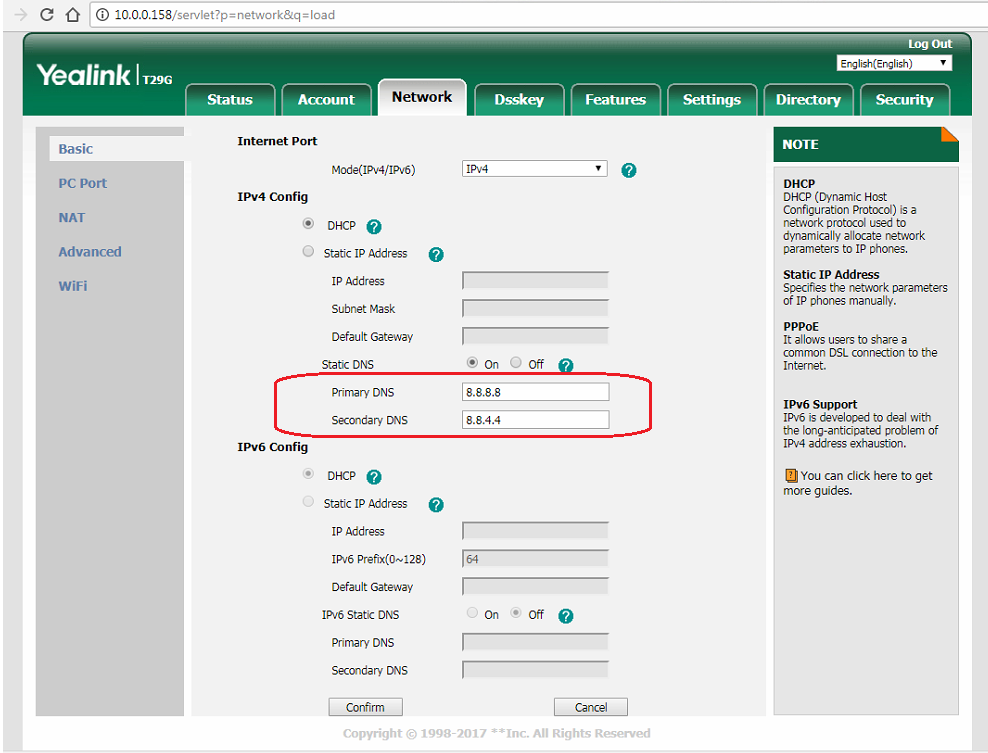
Step 5) If IP worked that means their gateway is not sending proper DNS server to the phone; just go to the network tab of each phone and set a static DNS there; you can use google DNS servers 8.8.8.8 and 8.8.4.4. This is a sample static DNS from a Yealink phone:
- Grandstream cannot make outbound calls:
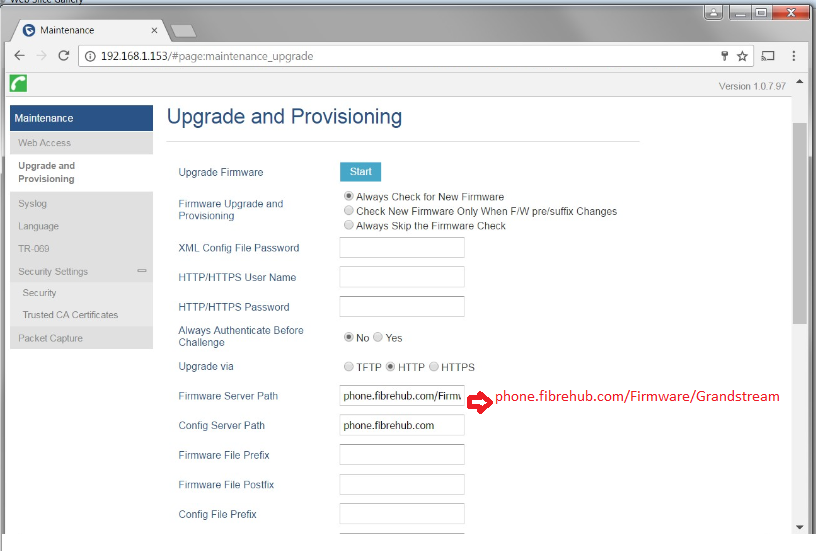
1) For GXP 2130, 2140 and 2160, please check if the firmware version is older than 1.0.7.97 (e.g. 1.0.7.25) then go to step 2, otherwise go to step 52) Go to Web UI => Maintenance => Upgrade and Provisioning => Firmware Server Path and set it to phone.fibrehub.com/Firmware/Grandstream, ask them to reboot the phone:
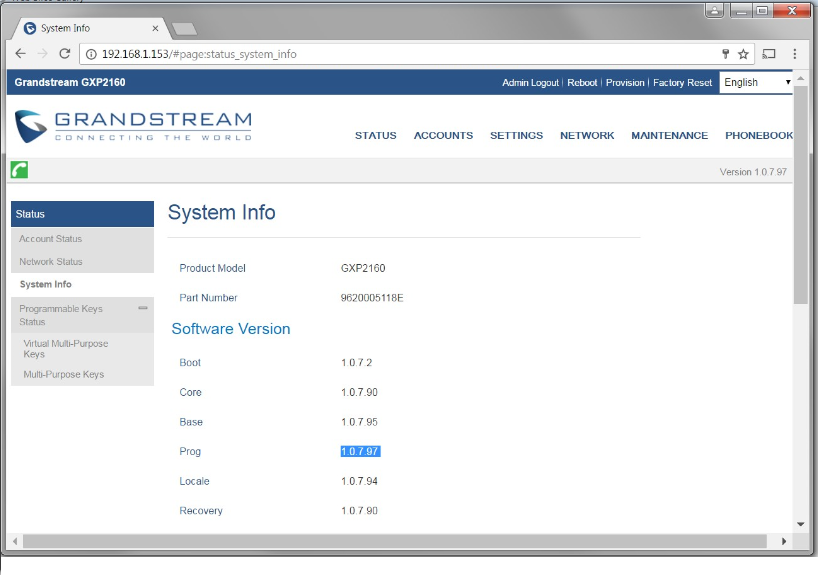
3) Once the phone is rebooted, under Status => System Info please make sure "prog Version" is set to 1.0.7.97 :
4) For this part it is important to open the Web UI of the phone on a different browser than previous step, or clear the browser cache otherwise it won't show.
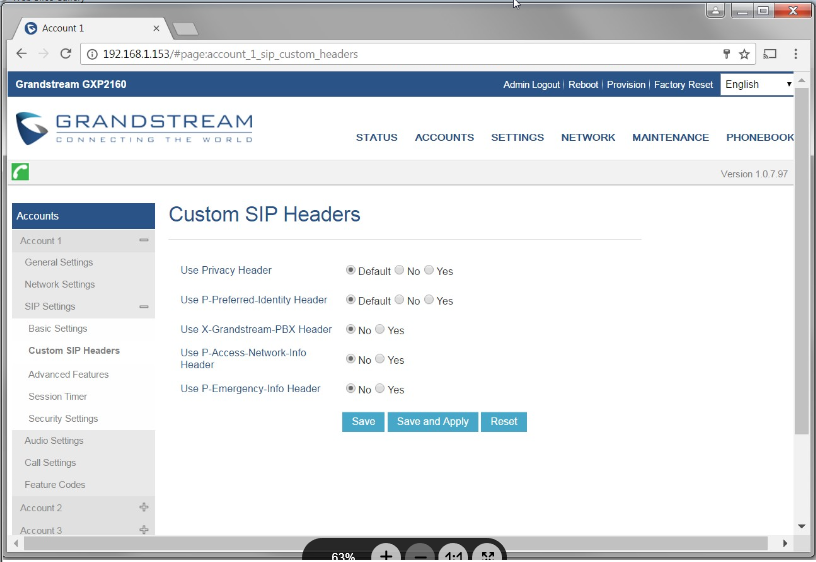
5) Go to Accounts => Account 1 => Sip Settings => Custom Sip Headers and set the first 2 radio boxes to "Default" and the last 3 to "No":
6) Repeat step 3 for other accounts they have.